KEY POINTS
Quick start:
Boil 1 gram of DME to 10 ml water
For example 100g DME - 1 litre water
3 Steps on How to Make a Yeast Starter for Beer:
Making a yeast starter is a great way to cut costs while making a delicious, high-gravity beer. And it’s WAY LESS COMPLICATED than it’s made out to be.
In this guide, we’ll show you how to make one in 20 minutes with minimal beer brewing equipment. But pay special attention—sanitation is KEY.
If you’re just getting started with homebrewing, learning how to make it is crucial. You’ll make better beer, save money.
Note: DRY YEAST: A starter isn’t absolutely necessary unless you want to save money on yeast packets. LIQUID YEAST: For liquid yeast, a starter is most likely necessary to increase the cell count and result in a faster start to fermentation and less frequent off flavours (eg. clove, banana) due to stressing the yeast.
Here’s everything you need to know:
What is a Beer Yeast Starter?
All you really need to know about a beer yeast starter is that it is basically a “mini batch of beer” except without the flavor (hops, etc.).
Pretend you’re making a batch of beer like you normally do but then skipping all of the stuff that makes it good.
A good starter serves 3 purposes:
Increase the Amount of Yeast to Ferment Your Beer: Buying packets of dry yeast adds up over time and most liquid yeast isn’t ready for the pitching rates. A cup of dried malt extract is basically free. Making a yeast starter can essentially double the available yeast cells to ferment your beer at a fraction of the cost.
Rehydrating Yeast: You know how you keep yeast in the fridge so it doesn’t degrade? When you’re ready to brew again, you’ve got to reactivate it. Think of it like taking your it out of hibernation.
Yeast Proofing: You can use your starter to check if it is still viable for brewing. If it’s been sitting around too long, it might be useless. A starter is a way to proof your yeast. If it is completely dead, you’d rather find out in a starter than in a 5 gallon batch of beer.
How to Make Yeast Starter in 3 Steps
Step 1: Equipment
Your starter wort does not have to be perfect. You don’t need all of the fancy bells and whistles. You only need a few specific pieces of equipment:
Note: This is for a 1-liter starter
• Magnetic Stir Plate with Bar (~$50) (optional if you plan to swirl by hand)
• Sanitized Laboratory-Grade Erlenmeyer Flask
• Aluminium foil
• Hydrometer (for checking gravity)
• Dried Malt Extract (DME)
• Yeast
• Water
Step 2: The Process
Ratio: For every 10 ml of water, use 1 gram of DME. So for 1-liter of water, use 100 grams of DME.
• Fill your flask or pot with 1200ml of water. Since some water will boil off, you have to overfill the flask/pot by 100-200ml.
• Pour your DME and boil the solution for 10-15 minutes.
• Stir vigorously every few minutes (by shaking if boiling in the flask). Be sure to watch the flask/pot so it doesn’t foam over.
• Prepare an ice bath in your sink.
• After 10-15 minutes (the solution will be clear), cool the solution down to 70-75 ℉ in the sink. This shouldn’t take more than 10 minutes. Make sure to give it a swirl and dunk in and out of the ice water.
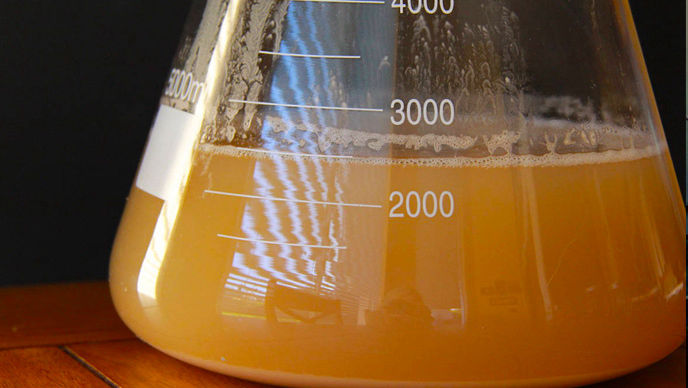
• Test the gravity of your starter with your hydrometer or refractometer (recommended). A gravity of around 1.040 should be fine for most types of beer and alcohol.
• If you used a pot pour the starter into a sanitised container preferably a Laboratory-Grade Erlenmeyer Flask.
• Put the starter on the stir plate or swirl by hand.
• Store in a warm place.
Warning: Even though the yeast packet is airtight, sanitize the outside of the packet to ensure you don’t infect your yeast. It takes no time at all. JUST DO IT.
Step 3: Let the Stir Plate Work its Magic
From here, just place the starter on the stir plate and let it go to work. Let it stir for your chosen amount of time and you’ve got your finished product ready to go.
There are generally two techniques that beginners use when brewing with a starter:
Leave it stirring until you brew: If you time it right, you can leave your starter on the stir plate until right before you pitch. Some claim this makes the healthy yeast cells ravenous and ready to ferment like a boss. Make sure it’s at least 12-14 hours.
Leave it for longer and put it in the fridge: If you aren’t ready to pitch, you can leave it stirring for up to 20 hours, place it in the fridge for a day or two, take it out, and let it warm up to room temperature before pitching.
Yeast Starter: Conclusion
It really all comes down to your preference and what you think is easiest. As with all things brewing, it’s about experimentation.
The more you brew the more refined your process will be and this will equip you with a skill on how to tell if yeast is good or not.
If you want the easiest way to increase cell count for fermentation temperature, rehydrate, or proof your yeast then a starter is the way to go.
If you intend to brew several batches of beer over a few days then making a starter allows you to use one batch of yeast to ferment all the batches of beer.
You can have one ready to stir in about 20-25 minutes, and it costs next to nothing in terms of ingredients. Using a starter will help you brew better beer.

INSTANT DOWNLOAD PDF
HAZY IPA | LAGER & PILSNER | BELGIAN & FRENCH ALES | FRESH HOP HARVEST BEER | UK ALES | USA IPA


